Arduino Internals: running wokwi simulation on CI/CD

Testing projects is one of the major challenges in embedded devices field. Many existing projects still rely on manual building by developers and exclusive manual tests on the real hardware. In such case, pushing the change that breaks the compilation, or breaks the functionality of device, could go unnoticed for some time. An additional issue is that testing each change and iteration on real hardware is time-consuming for developers.
While nothing really can fully replace the end tests on the real hardware, we can (and should) introduce multiple layers of testing that can be done automatically, without effort from the developers side.
Tools needed
In this post I will present one possible way of automating builds and tests for Arduino project. It will use:
- Arduino command line interface (Arduino CLI),
- automated builds with Github Actions,
- automated simulation with Wokwi simulator for simple testing.
With such approach, on each push to Github repository we will test on CI/CD that project builds and runs correctly.
Arduino CLI
To build and simulate Arduino projects from the scripts in CI/CD jobs we need to use Arduino command line interface. If you’re not familiar with it, you can read my introduction: Arduino Internals: building sketches with Arduino CLI.
Wokwi
Wokwi is a simulation platform that allows to run embedded project without using the real hardware.
It supports many Arduino boards, including:
- Arduino Uno (AVR),
- Arduino Mega,
- Arduino Nano.
With Wokwi, you can simulate the execution of an Arduino project and implement simple test cases based on the project’s serial output. In other words, you can build test cases that pass or fail depending on what the simulated device prints.
Wokwi is free to use, but it requires creating a free account.
Github Actions
GitHub Actions is a GitHub feature that allows you to run CI/CD jobs directly on GitHub repositories. It is free for open-source projects and easy to set up.
Many important templates and actions are already implemented and ready to use.
To work with Arduino projects, we need to install arduino-cli within GitHub Actions.
For this, we can use the setup-arduino-cli action — we only need to include it in our workflow.
Building our CI/CD pipeline
Let’s create a CI/CD pipeline that will build our project automatically (validate compilation) and run and check for serial output (validate execution).
Build Arduino sketch
The minimal example of Github Actions job that will build Arduino project is presented below:
|
|
This job builds the Arduino Uno firmware using Makefile and exports the compiled artifacts so the next job can use them for simulation or deployment.
Simulate execution with Wokwi
First, we need to create an account to use Wokwi.
Create an account in Wokwi
Open wokwi to create an account. For personal project Wokwi is free so choose the Free plan. In Free plan, we get 50 minutes of CI/CD simulation execution per month.
Create new Wokwi token
For using Wokwi, either locally or from Github Actions, we need to have the access token.
Go to https://wokwi.com/dashboard/ci and create a new token.
To use Wokwi from your PC (which will be helpful for debugging the setup) you need to export the token inside your
local envirnoment. For example, in Linux you can add the token to .bashrc:
|
|
Reopen the terminal so changes are applied.
Install wokwi-cli locally
wokwi-cli is the Wokwi command line interface that is used to run the simulation from CI/CD jobs.
But it’s also useful to have it locally for validating the simulation on host.
Install wokwi-cli locally, according to this instruction.
Initialize Wokwi project
To use wokwi, your project needs to contain two files:
wokwi.toml
This is a basic file describing version, board, elf and firmware location.
elf and firmware paths must be relative to wokwi.toml file. Ensure they match your project layout.
|
|
diagram.json
File describing connections. My simple project contains no connections, so the diagram.json looks like this:
|
|
You can use online creator to add new elements, like LEDs, buttons, etc. to your simulated board,
and copy generated diagram.json from web.
Run Wokwi sim locally
To test that your Wokwi setup works correctly, run:
|
|
This test runs the simulation and will succeed if application prints "Success". (Obviuosly, you need to add such print to your application).
This is the simplest simulation test for Arduino app. If it’s succeeding, you’re ready to add Wokwi test case to Github Actions.
Add wokwi simulation to github actions
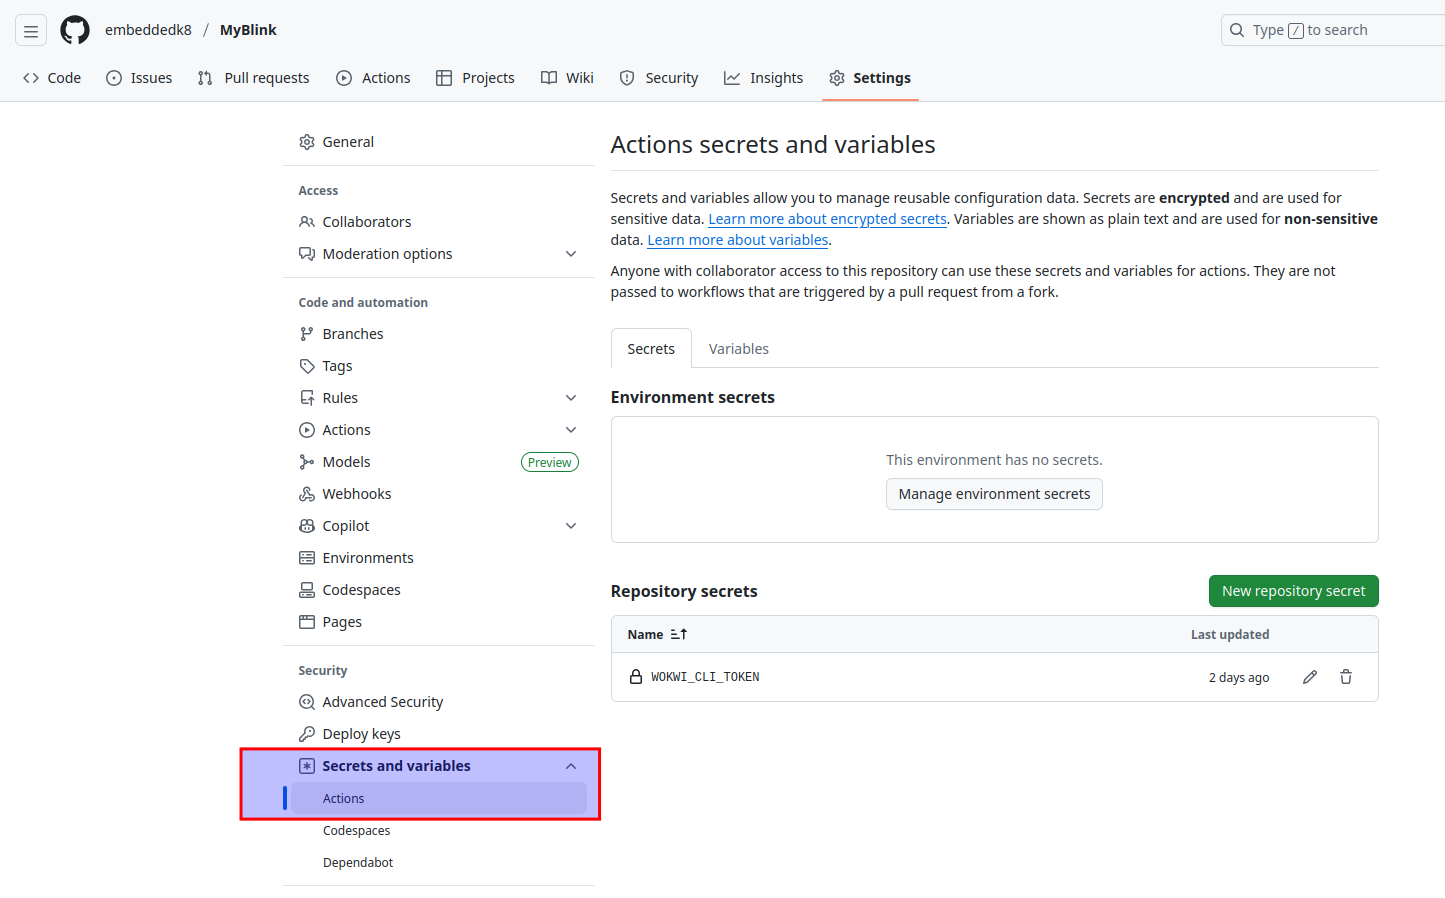
First, add WOKWI_CLI_TOKEN as a secret to your Github repository settings. You can reuse the same TOKEN as you have locally or create new token.
Choose Settings -> Secrets and variables -> Actions -> New secret and name your token WOKWI_CLI_TOKEN.
Wokwi simulation
The Wokwi simulation job will reuse artifact from build job.
|
|
Now, on each push, your Arduino application is built and tested.
Example project
The described jobs are executed on simple MyBlink project.